
How to Repair a Cracked Car Windshield: A DIY Guide
Learn how to repair a cracked car windshield at home with easy steps, tips for safe DIY fixes, and advice on when to call a professional for help.
That sharp, sickening smack of a rock hitting your windshield is a sound every driver dreads. It leaves you with a frustrating new blemish and a flood of questions. Is this a simple fix or am I looking at a full replacement? Can I handle this myself or do I need to call a professional? The good news is that you have options, and a small chip doesn't have to become a massive crack that empties your wallet. Understanding the difference between a repairable star break and a crack that requires a new windshield is the first step. This guide will walk you through everything you need to know about how to repair a cracked car windshield, from assessing the damage to deciding if a DIY kit is the right move for you.
Key Takeaways
Fix small chips before they spread: A tiny chip can quickly turn into a large, unrepairable crack from road vibrations or temperature changes, so addressing it immediately is the best way to avoid a more expensive full windshield replacement.
Recognize when a pro is necessary: DIY kits are not suitable for all damage; you should always call a professional for cracks longer than six inches, any damage in your direct line of sight, or flaws that reach the windshield's edge.
Check your insurance policy first: Before buying a kit, call your insurance agent, as many policies cover the full cost of a professional repair with no deductible, making it a safer and potentially free option.
Can My Windshield Crack Be Repaired?
Seeing a new crack or chip on your windshield is frustrating, and it immediately brings up the big question: can this be fixed, or am I looking at a full replacement? The good news is that many types of windshield damage are repairable, especially when you catch them early. The answer really depends on a few key factors: the type of damage, its size, and where it’s located on your windshield.
A small chip from a stray rock on the highway is very different from a long crack that runs from one side to the other. The location is just as important. A small flaw can be a major problem if it’s directly in your line of sight, while a larger crack might be manageable if it’s on the passenger side. Understanding these differences will help you decide whether a DIY kit is a good option or if it’s time to call in a professional. Your windshield is a critical safety feature of your car, providing structural support and ensuring your airbags deploy correctly, so making the right call is essential for your safety. Before you grab a repair kit, let’s walk through what kind of damage can typically be repaired and when a full windshield replacement is the only safe choice.
Chips, Stars, and Bullseyes
If the damage on your windshield looks more like a small spot than a line, you’re likely in luck. Small chips, star breaks (which have little legs branching out from a central point), and bullseyes (circular breaks) are usually the most straightforward types of damage to fix. These are often caused by small rocks or debris hitting the glass.
Because this kind of damage is contained to a small area, a professional can often inject a special resin that fills the break, restoring the windshield's strength and making the blemish nearly invisible. The key is to act quickly. Leaving a chip unattended exposes it to dirt and moisture, which can make a clean repair more difficult and increases the chance of it spreading into a larger crack.
Small Cracks (Under 6 Inches)
A common rule of thumb in the auto glass industry is that single cracks shorter than a dollar bill (about six inches) can often be repaired. If you have a short, straight crack that hasn’t reached the edge of the windshield, there’s a good chance it can be filled and sealed. This process stops the crack from spreading further and restores the structural integrity of the glass.
However, time is not on your side. Temperature fluctuations, from using your defroster to a hot day, can cause the glass to expand and contract, turning that small crack into a big problem overnight. Driving over a pothole can have the same effect. If you have a small crack, it’s best to get it looked at right away to see if a repair is possible.
When You Need a Full Replacement
Sometimes, a repair just isn’t a safe or effective option. If the crack is longer than six inches, it has likely compromised the overall strength of the windshield, making a replacement necessary. Another major red flag is any damage that reaches the edge of the glass. These edge cracks can weaken the crucial seal between the windshield and your vehicle's frame, which is essential for your car's structural stability.
Finally, any chip or crack located directly in the driver’s line of sight usually calls for a full replacement. Even the best repairs can leave a minor distortion in the glass, and you don’t want anything obstructing your view of the road. When dealing with this level of damage, it’s always best to seek professional auto glass services to ensure the job is done safely and correctly.
Your DIY Windshield Repair Toolkit
Okay, so you've decided to tackle that windshield chip yourself. High five for being proactive! Before you get started, let's talk about tools. Having the right equipment on hand is the difference between a smooth, successful repair and a frustrating afternoon. Most of what you need comes in a handy kit, but there are a few extra items you'll want to grab from around the house to make sure the job is done right. Think of this as your pre-repair checklist.
What's Inside a Repair Kit?
When you open a DIY windshield repair kit, you'll find a few key items designed to fill in the damage and make it nearly invisible. The star of the show is the repair resin, a special liquid that hardens to bond the glass back together. You'll also get an applicator tool, which usually looks like a small syringe or a suction-cup device. This tool's job is to create a vacuum over the chip, removing any air so the resin can flow into every tiny crevice. Most kits also include curing strips, which are small, clear plastic squares you place over the resin to help it dry smoothly, and a razor blade for scraping off any excess resin once it's cured.
Other Supplies to Grab
Your repair kit has the main components, but you'll need a few extra things for prep and cleanup. First, grab some rubbing alcohol and a clean, lint-free microfiber cloth. You need to clean the area around the chip thoroughly to remove any dirt, oil, or glass fragments. If you don't, the resin won't bond properly, and the repair might fail. It's best to perform the repair as soon as you notice the damage. If you can't get to it right away, place a piece of clear tape over the chip to keep moisture and debris out until you have time to fix it.
How to Choose the Right Kit
Walking down the auto parts aisle, you'll see several different repair kits, and it can be tough to know which one to pick. When you're looking for the best DIY windshield repair kit, you'll find most fall in the $15 to $35 price range. While it's tempting to grab the cheapest option, it's worth reading reviews to see what other drivers have experienced. Some kits are specifically designed for bullseye or star-shaped chips, while others are better for small cracks. Make sure the kit you choose matches the type of damage you have. A quality kit will have clear instructions and enough resin for at least one repair, giving you the best shot at a clean, lasting fix.
How to Stop a Windshield Crack from Spreading
That sinking feeling when a rock hits your windshield is the worst. But what you do in the moments right after can make all the difference between a simple repair and a full replacement. A small crack has the potential to spread quickly, but with a few careful steps, you can keep the damage under control until you can get it professionally fixed.
What to Do Immediately
The most important thing is to act fast. A small chip or crack can quickly spiderweb across your glass due to road vibrations or temperature shifts. The first thing you should do is gently clean the area around the damage with a dry cloth and cover it with a piece of clear tape. This simple step helps keep dirt and moisture out, which makes for a cleaner and more effective repair later on. While this is a great temporary fix, it’s not a permanent solution. Getting a professional chip repair as soon as possible is the best way to prevent the damage from worsening.
Managing Temperature Changes
Your windshield is sensitive to extreme temperature swings, and a crack makes it even more vulnerable. Blasting the defroster on high on a frosty morning or cranking the AC on a sweltering Kansas City day can cause the glass to expand or contract too quickly, forcing the crack to spread. To prevent this, try to park in a garage or at least in the shade whenever possible. When you do need to adjust the temperature inside your car, do it gradually. Avoid hot water car washes until the crack is fixed. Taking these small precautions can make a big difference and might be what saves you from a more expensive windshield replacement.
Tips for Driving with a Damaged Windshield
While you’re waiting for your repair appointment, you’ll want to drive a little more cautiously. Every bump and jolt puts stress on the windshield. Try to avoid potholes, drive slowly over speed bumps, and don’t slam your car doors. Beyond the risk of the crack spreading, a damaged windshield can be a safety issue. It can weaken the structural support of your vehicle and, in many places, a crack in the driver's line of sight can cause your car to fail its state inspection. Don't wait for the problem to get worse. The best course of action is to get a free quote and schedule a mobile repair to get it fixed right away.
How to Repair a Small Windshield Crack: Step-by-Step
Okay, you’ve got your kit and you’re ready to tackle that annoying little crack. Taking your time and being methodical is the key to getting a good result. Before you start, read the instructions in your specific repair kit from start to finish, as steps might vary. Find a shady spot to work, as direct sunlight can cause the resin to cure too quickly, before it fully penetrates the crack. This process works best on a cool, dry day. Let's walk through the main steps together.
Step 1: Prep the Damaged Area
First, you need a clean workspace. Use the pushpin from your kit to gently pick out any tiny, loose shards of glass from the crack. Be careful not to apply too much pressure. Once the loose bits are gone, it’s time to clean. Apply a small amount of rubbing alcohol to a clean microfiber cloth and wipe down the area. This removes any dirt or oil that could prevent the resin from creating a strong bond. A truly clean car glass surface is critical for a successful repair, so don’t skip this part. Let the area dry completely.
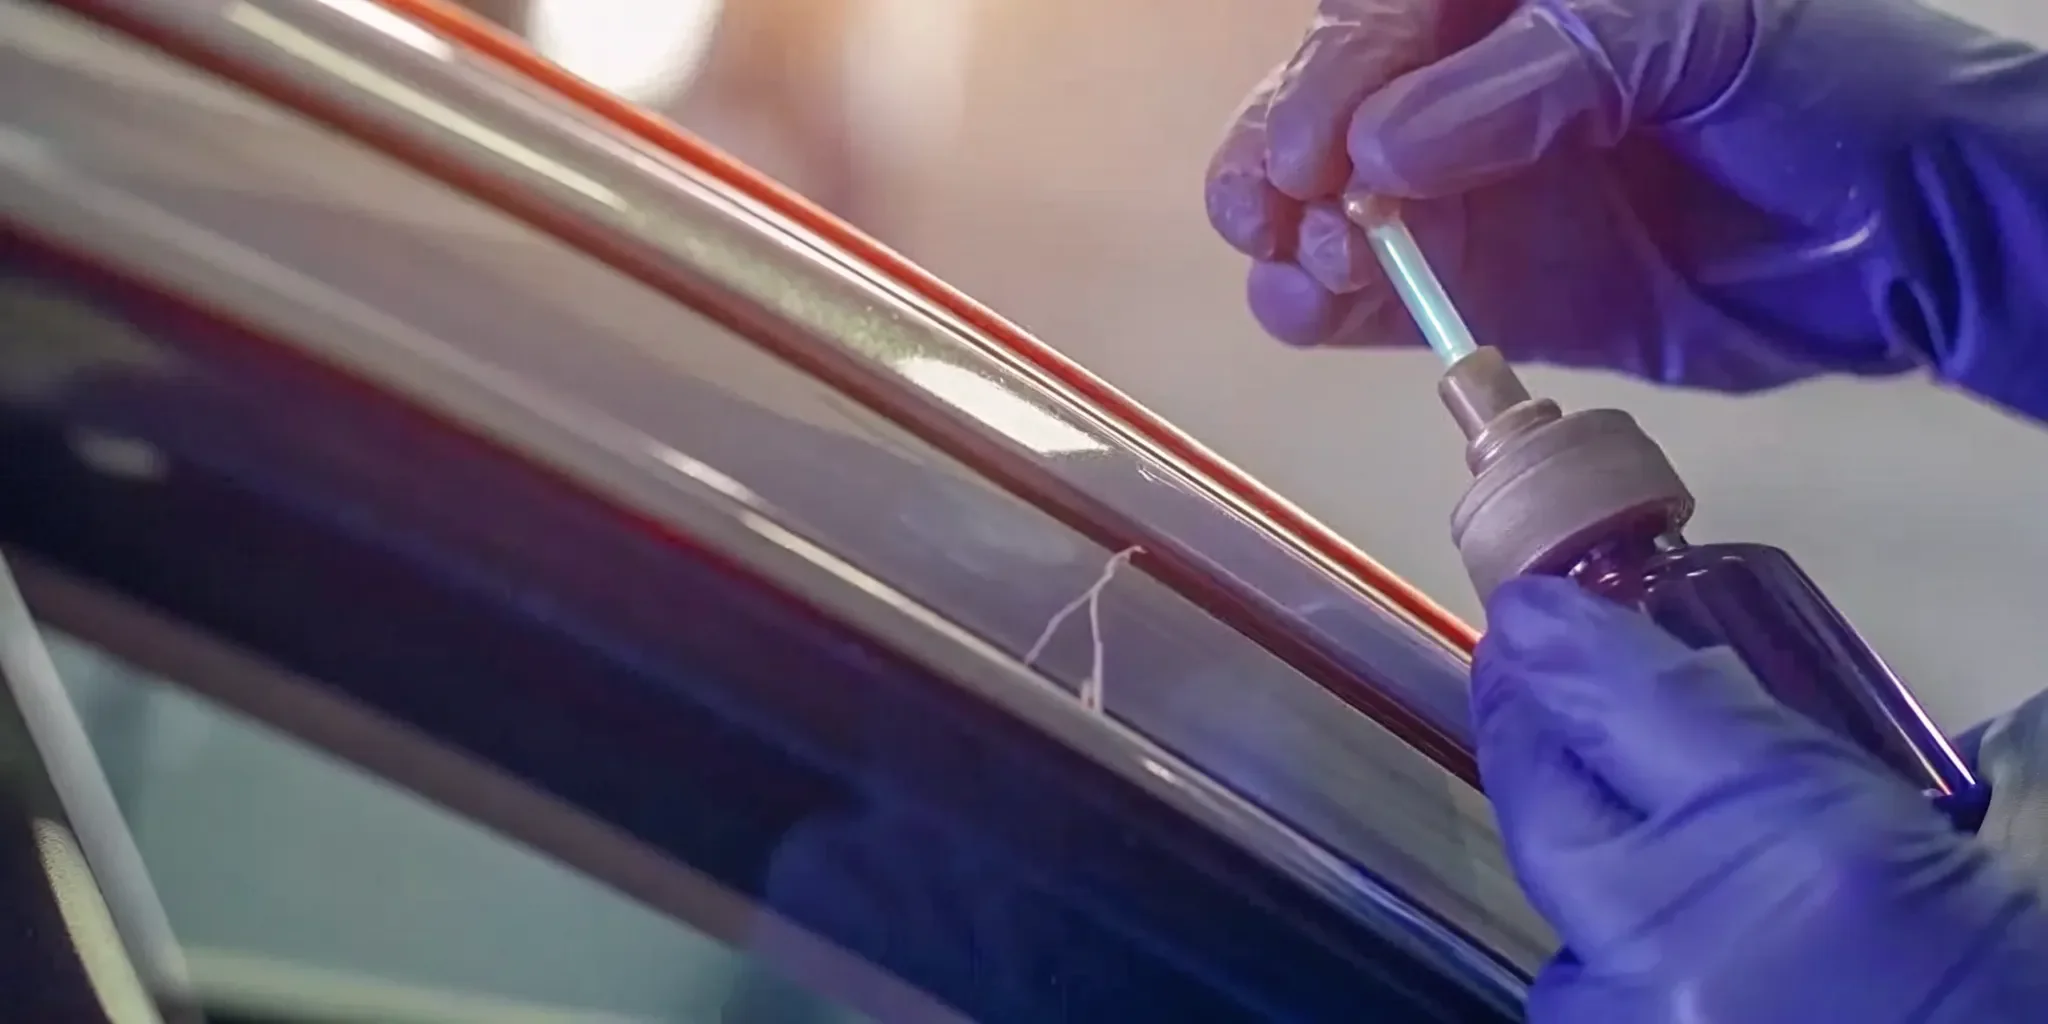
Step 2: Apply the Repair Resin
Now for the main event. Your kit will have an applicator, often a suction-cup pedestal and a resin injector. Place the applicator’s seal directly over the crack’s center and press down firmly to create a tight seal. Following your kit’s instructions, screw the resin injector into the pedestal and add the recommended drops of resin. The goal is to use pressure to force the liquid windshield repair resin deep into the crack, filling every tiny space. This is what makes the crack less visible and restores the glass’s structural integrity.
Step 3: Cure and Finish the Job
Once the resin has filled the crack, remove the applicator. Immediately place a clear curing strip from your kit over the wet resin, smoothing it out to remove air bubbles. Now, the resin needs to harden, or "cure." Move your car into direct sunlight for this part, as the sun's UV rays activate the resin and make it solidify. Let it sit for the time recommended in your kit, usually 15 to 30 minutes. After it’s fully cured, use the provided razor blade at a 45-degree angle to carefully scrape off the excess hardened resin, leaving a smooth, clear finish.
Common DIY Repair Mistakes to Avoid
You’ve got your kit, you’ve read the instructions, and you’re ready to tackle that crack. That’s great! But before you start, let’s talk about a few common mistakes that can derail your repair. Even a small misstep can mean the difference between a nearly invisible fix and a problem that’s worse than when you started. Taking a few extra minutes to get these details right will save you a lot of frustration and help you get a result you can be proud of.
Rushing the Curing Time
Patience is probably the most important tool you’ll use for this job. After you apply the resin, it needs time to cure, which is the process of hardening and bonding with the glass. It’s tempting to want to speed things up, but this is where you need to slow down. The instructions in your kit will give you a specific curing time, and you should follow it exactly. If you rush it, the resin won't form a strong, durable bond, and your repair could fail. Remember, the longer a crack is exposed to the elements, the more dust and moisture can get in, making any repair less effective. Giving the resin its full time to cure ensures it creates a solid, lasting fix.
Working in the Wrong Environment
Where you do the repair matters just as much as how you do it. Trying to fix your windshield in direct, hot sunlight is a recipe for a weak repair. The heat can cause the resin to cure too quickly, before it has a chance to seep into every tiny crevice of the crack. This can trap air bubbles and prevent a solid bond from forming. Instead, you should always park in the shade and let the glass cool down to the touch before you begin. A garage or carport is ideal. Similarly, avoid doing repairs in the rain or extreme cold, as moisture and low temperatures can also interfere with the resin's ability to cure properly. A controlled environment gives you the best shot at a clean, strong repair.
Using the Wrong Tools or Methods
All DIY kits are not created equal, and the quality of your materials will directly impact the quality of your repair. A cheap kit might seem like a bargain, but it could come with low-grade resin that yellows over time or doesn't hold up. For a repair to be successful, you need a kit that uses a high-quality structural adhesive resin and the right tools to apply it. The injector mechanism is especially important, as its job is to create a vacuum and force the resin deep into the damage. It's also critical to follow the kit's instructions precisely. Every kit is a little different, so don't assume you know the process. Using the right tools and methods is key to restoring your windshield's integrity.
When to Call a Professional
While a DIY kit can be a lifesaver for a tiny chip, there are times when you absolutely need to put down the tools and call in a professional. Knowing the difference isn't just about getting a better-looking repair; it's about ensuring your safety and the structural integrity of your vehicle. Some jobs require specialized tools and expertise to be done right, and trying to tackle them yourself can sometimes make things worse. If you find yourself hesitating, it’s usually a sign that a professional opinion is your best next step. A quick call can save you from a bigger headache later on.
If the Damage is Too Large or Complex
If you're looking at a crack that's longer than a dollar bill or a chip with multiple legs branching out, it's time to call for backup. Extensive or complicated damage is beyond the scope of most DIY kits. A professional can often complete a repair in about 30 minutes, preventing the damage from spreading and forcing a full windshield replacement. It's especially important to avoid a DIY fix if the crack is very close to the edge of the windshield. This area is critical for your windshield's strength, and a failed repair can compromise the entire structure. For these kinds of issues, professional auto glass services are the safest and most effective solution.
If the Crack is in Your Line of Sight
This one is non-negotiable. If the crack or chip is directly in your line of sight while driving, you need to have it professionally repaired. A DIY repair can leave behind small distortions or cloudiness in the resin, which can impair your visibility and create a dangerous distraction on the road. Think about glare from the sun or headlights hitting that spot. Beyond the safety risk, many states will fail your vehicle inspection for any damage that obstructs the driver's view. Don't take a chance with your safety or a failed inspection; let a technician handle it to ensure a perfectly clear and secure finish.
Understanding Your Insurance Coverage
Before you even buy a repair kit, take a moment to check your auto insurance policy. You might be surprised to find that your provider will cover the full cost of a windshield repair with no out-of-pocket expense to you. Insurers often prefer to pay for a small, inexpensive repair because it prevents them from having to cover a much more expensive full windshield replacement later. A quick call to your agent can clarify your coverage. Many professional auto glass shops, including our team at Avision, can even help you with the insurance claim process. Getting a free quote is a great first step to understanding your options.
Did Your DIY Repair Work?
You’ve followed the instructions, applied the resin, and let it cure. Now comes the moment of truth: did your DIY fix actually work? It can be tricky to tell if your handiwork is just a cosmetic patch or a genuine, lasting repair. Before you get back on the road, it’s important to inspect your work to make sure your windshield is safe and the repair will hold up against bumps, weather, and time. A faulty repair can spread unexpectedly, putting you right back where you started, or worse.
What a Successful Repair Looks Like
When done correctly, a DIY repair should make the original damage almost disappear. The main goal is to restore the structural integrity of the glass, and a successful repair achieves this by making the chip or crack nearly invisible. While you might still see a very faint outline of the original damage if you look closely, the repaired area should be clear and free of any dark spots or cloudiness. The resin should have completely filled the crack, leaving a smooth, transparent finish that blends in with the rest of the windshield. Anything less could mean the damage wasn't fully sealed.
How to Test Your Repair
First, give the area a close visual inspection. Look at it from different angles in good light. A solid repair won't have any air bubbles or moisture trapped under the surface, which are signs that the resin didn't cure properly. Make sure the crack hasn't spread beyond the repaired zone. Next, do a quick touch test. Gently run your finger over the spot. It should feel perfectly smooth, with no roughness or raised edges. If you feel any imperfections or see that the crack is still visible, the resin may not have settled correctly. If your repair doesn't pass these checks, it's best to get a professional opinion. You can always contact us for a free quote and an expert assessment.
DIY vs. Professional Repair: A Cost Breakdown
When you're staring at a crack in your windshield, the first question that often comes to mind is, "How much is this going to cost me?" It’s tempting to grab a cheap DIY kit and call it a day, but it's important to weigh the upfront price against the long-term value. The true cost isn't just about the money you spend today; it's also about your time, the quality of the repair, and your peace of mind on the road. Let's break down what you're really paying for with each option.
Choosing between a DIY fix and a professional service depends on the damage, your comfort level, and your budget. While a quick fix might seem appealing, a professional repair often provides a more durable and reliable solution. At Avision Auto Glass, we believe in giving you all the information so you can make the best choice for your vehicle and your safety. Our mobile auto glass services are designed to be convenient and dependable, ensuring the job is done right the first time.
The Real Cost of a DIY Kit
At first glance, a DIY windshield repair kit seems like a bargain. You can find them at most auto parts stores for anywhere between $10 and $30. These kits typically come with a resin and an applicator tool designed to fill in small chips and cracks. While the low price is attractive, it doesn't tell the whole story. You also have to factor in your own time and the risk involved. If the repair isn't done perfectly, you could trap air bubbles in the resin, make the crack worse, or end up with a cloudy spot that obstructs your view. A failed DIY attempt can also make it impossible for a professional to properly repair the damage later, forcing a full replacement.
The Value of Professional Service and Warranties
Calling a professional might seem more expensive upfront, but it often provides better value in the long run. Technicians have the training, experience, and commercial-grade materials to ensure a strong, clear, and lasting repair. Plus, the service is incredibly convenient, especially with mobile options that come to your home or office. Many professional repairs also come with a lifetime workmanship warranty, which is something you just can't get from a box. This guarantees the repair won't fail or spread. Even better, many auto insurance policies will cover the cost of a chip repair completely, meaning a professional fix could cost you nothing out of pocket. It's always worth checking your policy before starting a DIY project.
Why You Shouldn't Wait to Repair Your Windshield
It’s so easy to do. You’re driving down the highway, a rock flies up, and smack—a tiny chip appears on your windshield. Your first thought might be, “It’s small, I’ll deal with it later.” But putting off that small repair is one of the biggest gambles you can take with your vehicle. That little chip is a weak point, and ignoring it can lead to bigger problems that compromise your safety and hit your wallet hard. From turning into a massive crack overnight to affecting your car's structural integrity, a damaged windshield is more than just a cosmetic issue. Let's break down exactly why you should address windshield damage right away.
The Risks to Your Safety and Vehicle
Your windshield does more than just block wind and rain; it’s a critical safety feature. It provides a significant amount of your vehicle's cabin strength in a rollover accident and helps your airbags deploy correctly. When it's cracked, its structural integrity is compromised. A small chip can easily spread due to road vibrations or temperature shifts, turning into a large crack that obstructs your view. This is not only dangerous but can also cause your car to fail its vehicle inspection. The bottom line is that a damaged windshield makes your car less safe for you and your passengers. Getting a professional auto glass service to look at it quickly is the best way to keep everyone protected.
How Waiting Can Cost You More
Procrastinating on a windshield repair almost always costs more in the long run. A small chip can often be fixed in under 30 minutes with a simple resin injection, a quick and affordable process. However, if you wait, that chip can spread into a crack that can’t be repaired. This means you’ll need a full windshield replacement, which is significantly more expensive and time-consuming. Many insurance policies will even cover the cost of a repair with no deductible, making it free for you. By waiting until you need a replacement, you’ll likely have to pay your deductible. It’s always better to fix a small problem before it becomes a big, expensive one.
How to Care for Your Windshield After a Repair
Your windshield is repaired, and you're ready to get back on the road. But before you hit the gas, taking a few simple steps can make a huge difference in the longevity of your new glass. Proper aftercare ensures the repair or replacement sets perfectly, keeping you safe and saving you from future headaches. Think of it as a small investment to protect a big one. A little patience and care in the first couple of days will help your windshield last for years to come.
Simple Post-Repair Care Tips
The first 48 hours are the most critical for your new windshield. The most important rule is to wait at least one hour before driving. This gives the powerful adhesive used to seal your windshield enough time to cure and form a strong bond. Rushing this step can compromise the seal. You’ll also want to skip the car wash for a day or two. High-pressure water can disturb the fresh adhesive before it fully cures, which is a key part of windshield replacement aftercare. It’s also a good idea to be gentle when closing your car doors for the first few days. Slamming a door can create a sudden change in air pressure inside the car, putting stress on the new seal while it’s still setting.
How to Prevent Future Damage
Once your repair has fully cured, you can protect your windshield from future trouble with a few good habits. First, try to avoid sudden temperature changes. Parking in a garage or a shady spot on hot days prevents the glass from expanding too quickly, which can cause stress cracks. Second, be mindful on the road. Keep a safe distance from construction vehicles and large trucks that can kick up rocks and debris. A small chip can quickly turn into a large crack that requires a full replacement. If you do get a new chip, don't wait. Getting it looked at right away is the best way to prevent the damage from spreading. Our mobile repair services can fix small chips before they become a bigger issue.
Related Articles
- When To Replace a Windshield vs. Repair
- Why a Small Windshield Chip Spreads & How to Stop It
- DIY Windshield Chip Repair: A Complete Guide
- Different Types of Windshield Cracks
- Do Cracked Windshields Pass Inspection?
Frequently Asked Questions
How do I know if I should try a DIY kit or just call a professional? A good rule of thumb is to consider the three S's: size, spot, and severity. If you have a very small, simple chip (smaller than a quarter) that isn't directly in your line of sight, a high-quality DIY kit can be a good option. However, if the damage is a crack longer than a few inches, has multiple legs, or is anywhere in your direct view of the road, it's always best to call a professional. Your safety isn't worth the gamble, and a pro can ensure the repair is done correctly.
Is a repaired windshield really as strong as the original? Yes, when done correctly, a professional repair restores the structural integrity of your windshield. The specialized resin used by technicians is incredibly strong and bonds the glass back together, preventing the damage from spreading. While a DIY kit can also provide strength, professional-grade materials and application techniques ensure the most durable and reliable result, making your windshield safe again.
Will my insurance actually cover the cost of a professional repair? It’s very common for auto insurance providers to cover the full cost of a windshield repair without requiring you to pay a deductible. They do this because it's much more affordable for them to pay for a small repair now than to pay for a full windshield replacement later. It's always a good idea to call your insurance agent to confirm your specific coverage, but you might be pleasantly surprised to find that a professional fix costs you nothing.
I tried a DIY repair and it doesn't look right. Can it still be fixed? This can be a tricky situation. If a DIY repair fails, it's sometimes possible for a professional to fix it, but it depends on the extent of the issue. A failed attempt can sometimes trap air or moisture, or the resin may not have cured properly, making a second repair more difficult. The best course of action is to have a professional technician take a look. They can assess the damage and let you know if a proper repair is still possible or if a replacement is now the safest option.
How long do I have to wait before I can drive my car after a professional repair? One of the best parts of a professional repair is how quick it is. For a simple chip or small crack repair, the process itself usually takes about 30 minutes. Once the technician is finished, the resin is fully cured and you are safe to drive away immediately. There's no downtime, which makes it an incredibly convenient solution.