4 Best Car Window Chip Repair Kits for DIYers
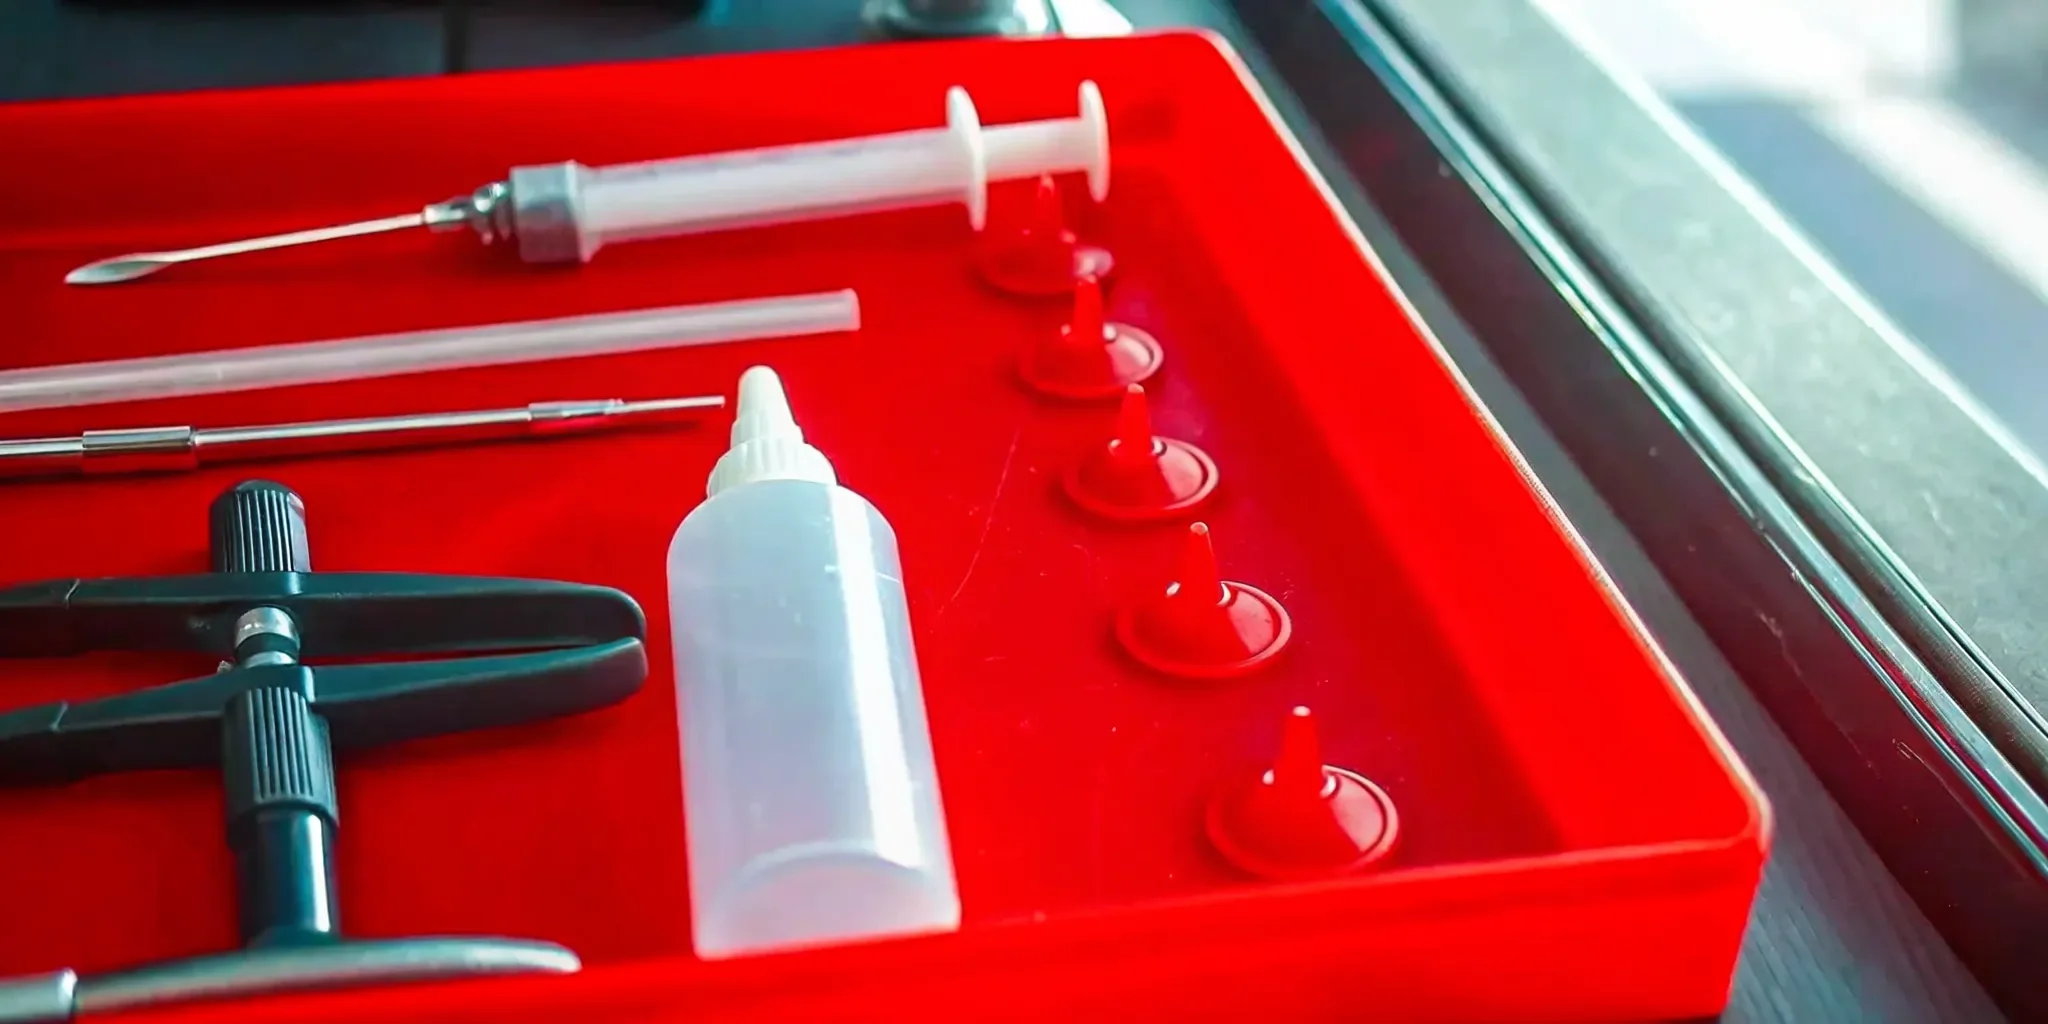
Few things are as unwelcome as an unexpected car expense. When a rock leaves its mark on your windshield, your mind immediately goes to the cost. A car window chip repair kit, often priced under twenty dollars, can seem like the most logical and budget-friendly answer. But is the cheapest option always the best value? A failed DIY repair can make the damage worse, turning a simple fix into a mandatory and much more expensive windshield replacement. This article will help you look beyond the sticker price to understand the true cost and benefit of a DIY repair, so you can make a decision that’s good for both your car and your wallet.
Key Takeaways
- Know the limits of a DIY kit: These kits are designed for very small, simple rock chips (smaller than a quarter) and are not a solution for cracks, complex breaks, or any damage in the driver's line of sight. For significant damage, professional service is essential for safety.
- The DIY process is a delicate procedure: A successful repair requires careful prep, the right temperature, and a steady hand to avoid trapping air bubbles or making the damage worse. The quality and longevity of the fix are entirely dependent on your application.
- Consider the true value of a professional repair: Before buying a kit, check if your auto insurance covers chip repairs for free, as many policies do. A professional not only saves you the hassle but also provides a guaranteed, high-quality repair that restores your windshield's structural integrity.
What Is a DIY Windshield Chip Repair Kit?
You’re driving down the highway, minding your own business, when smack—a rock flies up and leaves a tiny star on your windshield. Your first thought might be to grab a DIY windshield chip repair kit. These kits are sold as a quick and easy fix for minor damage, letting you handle the repair yourself right in your own driveway. They come with all the basic tools and a special resin designed to fill in small chips and cracks, hopefully stopping them from spreading and saving you a trip to the shop. But before you add one to your cart, it’s good to know exactly what they can and can’t do.
How do they work?
The idea behind a DIY kit is pretty straightforward. At its core, the process involves cleaning out the damaged spot and then injecting a clear resin into the chip or crack. This resin is designed to seep into all the tiny crevices of the break. Once it’s in place, you let it cure, which usually involves leaving it in direct sunlight. The UV rays harden the resin, bonding the glass back together. This helps restore the structural strength of the glass and makes the damage much less noticeable. The goal is to create a smooth, solid surface that prevents the chip from turning into a long, windshield-ruining crack.
What damage can a DIY kit actually fix?
This is the million-dollar question, and where you need to be realistic. DIY kits are really only meant for very minor damage. As a general rule, if the chip is smaller than a quarter and any connected cracks are shorter than a few inches, a kit might handle it. These kits are designed to address small, simple bullseye or star-shaped breaks. Anything larger, more complex, or directly in the driver's line of sight is a different story. For that kind of damage, a DIY fix often isn't strong enough to truly restore the windshield's safety and integrity, and it’s time to consider a professional repair.
A Look at Popular DIY Chip Repair Kits
When you start searching for a DIY kit, you'll find a ton of options. They range from simple, single-use kits you can grab at an auto parts store to more complex systems that look like they belong in a professional's toolbox. The right one for you depends on the type of damage you have, your budget, and how confident you feel taking on the repair yourself. It can be tough to know which ones actually work and which are a waste of money.
To give you a better idea of what's out there, let's walk through a few of the most talked-about kits on the market. We'll look at what makes each one popular, what kind of damage they're best for, and what you can expect from them. This should help you decide if one of these is the right fit for your windshield's little problem.
Rain-X Windshield Repair Kit
You've probably seen the Rain-X name before, and their windshield repair kit is just as common. It's one of the most popular choices for a reason: it's affordable and easy to find. For about the price of a fancy coffee, you can pick one up and tackle a small chip. Users often point out that it's a great value for minor fixes. This kit is best for small, simple bullseye or star-shaped chips. It's a solid entry-level option if you're dealing with your first tiny rock chip and want to prevent it from spreading without a big investment.
GlasWeld Professional Windshield Repair Kit
If you're looking for something a step up from the basic kits, the GlasWeld Professional Windshield Repair Kit is geared toward the serious DIYer. This system is designed to give you results that are much closer to what a professional technician achieves. It’s built to handle a wider variety of damage, from standard rock chips to longer cracks. The kit includes advanced features like a powerful injector that creates a strong vacuum to pull air out of the break, ensuring the resin fills every tiny space. It's a bigger investment, but it’s a comprehensive system for those who want top-tier repair quality.
Delta Kits Professional Windshield Rock Chip Repair Kit
Delta Kits is another name that consistently gets high marks from users. Their kits are known for being effective and user-friendly, earning them excellent customer ratings. They offer a wide range of professional windshield repair kits that cater to everyone from first-timers to seasoned pros who might be starting a side business. What’s great about Delta Kits is their focus on quality tools and resins that are designed to last. If you’re looking for a reliable system that has a strong reputation for performance and is trusted by many in the industry, this is a brand worth checking out.
Kivaj Qfix20
When you need a fix and you need it fast, the Kivaj Qfix20 is a name that comes up. Its main selling point is speed. According to some DIYers, the kit’s fast-acting resin sealer can get the job done in about 20 minutes. This is a huge plus if you have a busy schedule and can't afford to wait around for hours. While it might not have the same brand recognition as Rain-X, it's a convenient choice for those who prioritize a quick and straightforward repair process for minor chips. It’s another great option to keep in your garage for those unexpected rock encounters.
DIY Kits: How Do They Stack Up?
When you start comparing DIY windshield repair kits, you’ll notice they vary a lot in price, quality, and what they promise to deliver. It can be tough to know which one is right for you or if they even work as advertised. Let’s break down what you can realistically expect from these kits when it comes to ease of use, repair strength, and overall value. Understanding these differences will help you decide if tackling that chip yourself is the best move or if it’s a job better left to a professional.
While a DIY kit can seem like a quick fix, the results depend heavily on the kit's quality and your own handiwork. A successful repair needs a steady hand and the right conditions, which can be tricky to get right in your own garage. If the process feels daunting, remember that a professional repair is always an option for a guaranteed, stress-free result.
Ease of use
Most DIY kits are designed with beginners in mind. They come with step-by-step instructions, and many brands, like Delta Kits, even provide online training videos to walk you through the process. However, "easy" can be subjective. The process involves cleaning the chip precisely, applying a suction-cup-like tool, and injecting resin under pressure. It requires patience and a bit of finesse. If you’re not careful, you can trap air bubbles or apply the resin unevenly, which can make the damage look worse and compromise the repair.
Repair capabilities
DIY kits are made for one thing: small, simple rock chips and maybe a tiny crack (less than an inch). A quality kit, like the GlasWeld Professional Windshield Repair Kit, is effective at filling these small blemishes and stopping them from spreading. However, they are not a solution for long cracks, multiple impact points, or damage directly in the driver’s line of sight. Trying to fix complex damage with a DIY kit can fail and often makes it impossible for a professional to properly repair it later, leading to a full windshield replacement.
Quality of materials
The quality of a kit’s components directly impacts the final result. High-end kits often feature injectors made from strong stainless steel that are built to last, while budget options rely on plastic parts that can break or fail to create a proper vacuum. The most critical component is the resin itself. Professional-grade resins are formulated to be incredibly strong and clear, creating a bond that’s nearly invisible. The resin in cheaper kits may not be as durable, and it can yellow over time, leaving you with a discolored spot on your windshield.
What's in the box?
What you get in a kit varies widely. A basic, single-use kit from a brand like Rain-X will have just enough resin and the necessary tools for one repair. On the other end of the spectrum, a pro-level kit from GlasWeld might include enough supplies for up to 250 repairs. For the average driver, a single-use kit is usually enough to handle an occasional rock chip. The multi-use kits are better suited for car enthusiasts who work on multiple vehicles or for small businesses managing a fleet.
How long do DIY repairs last?
When done correctly with a quality kit, a DIY repair can be quite durable. Many users of brands like Delta Kits report that their repairs hold up well over time, effectively stopping chips from spreading. The key phrase here is "when done correctly." The longevity of the repair is entirely dependent on your application. An improper repair might look fine at first but can fail weeks or months later. This is where professional service stands out; at Avision, for example, we back our work with a lifetime workmanship warranty for your peace of mind.
What's the Price Tag on a DIY Kit?
When you start shopping for a windshield chip repair kit, you'll notice the prices are all over the map. You can find options for less than the cost of lunch, while others are a serious investment. The right choice depends on the quality of the repair you're after and how many times you plan to use the kit. Let's break down the typical price ranges and what you can expect from each.
Budget-friendly kits ($10–$50)
If you’re looking to fix a single, small chip without spending much, this is where you'll start. Kits in this price range are typically designed for one-time use and are widely available online and in auto parts stores. For example, one driver on Reddit mentioned grabbing a kit for around $12 to fix a small rock chip. These kits are basic, usually containing a small amount of resin and a simple plastic injector. They can be a decent option for a very minor blemish if you follow the instructions perfectly, but don't expect professional-level results or durability.
Mid-range options ($50–$200)
For the serious DIYer or someone with a few cars to maintain, a mid-range kit offers a better balance of quality and cost. These kits often feature higher-quality resin, more durable metal injectors, and enough supplies for multiple repairs. The initial cost is higher, but the price per repair drops significantly. For instance, some suppliers note that while the kit is an investment, the actual cost of supplies for a single repair can be less than a dollar. This makes it a cost-effective choice if you anticipate dealing with rock chips more than once.
Pro-level kits ($200–$1,500)
This is the territory of professional technicians and auto glass businesses. Pro-level kits are built for performance, durability, and high-volume work, with prices ranging from a few hundred dollars to well over $1,500. These systems include advanced injectors that create a stronger vacuum, superior resins, and specialized tools for achieving a near-invisible repair. Buying one of these is less about a quick fix and more about investing in a business tool. For most drivers, the cost and complexity of a professional kit highlight the value of simply calling a trained technician who already has the best equipment.
Your Step-by-Step Guide to Using a Chip Repair Kit
If you’ve decided to give a DIY kit a try, getting the steps right is everything. The process requires patience and a steady hand, as even a small mistake can make the damage worse or lead to a failed repair. Think of it less like a quick fix and more like a delicate procedure. Here’s a breakdown of the process, from prep to polish, to help you get the best possible result from your kit.
Step 1: Prep and clean the damage
Before you even think about opening the resin, your first job is to thoroughly clean the damaged area. Any tiny bits of glass, dirt, or moisture trapped inside the chip will prevent the resin from bonding correctly, leaving you with a weak and cloudy repair. Start by carefully picking out any loose glass fragments from the impact point with a pushpin. Then, use a cloth with a bit of rubbing alcohol to clean the surface and the inside of the chip. Let it dry completely before moving on. A clean and dry workspace is non-negotiable for a successful DIY repair.
Step 2: Mind the temperature
The resin in your repair kit is sensitive to temperature. If it’s too cold, the resin will be too thick to flow into the tiny crevices of the chip. If it’s too hot, it might cure too quickly before it has a chance to fill the damage completely. Most kits work best in a shady spot with an ambient temperature between 50 and 75 degrees Fahrenheit. This is one area where professional gear has a clear advantage; technicians use specialized tools to ensure the glass is at the perfect temperature for an optimal cure, regardless of the weather. For a DIY repair, you’ll have to rely on picking the right day and time.
Step 3: Position the injector
Your kit will come with an applicator, which is usually a plastic pedestal with a suction cup and a threaded injector. The goal is to create a perfect seal around the chip. Center the opening of the pedestal directly over the impact point and press down firmly to attach the suction cup to the glass. This seal is critical because it allows the injector to create a vacuum, which pulls air out of the chip. Getting the placement right ensures the resin can penetrate every part of the crack. Professional windshield repair kits often include more robust tools for precise positioning, but with care, you can get a good seal with a basic kit.
Step 4: Inject the resin (carefully!)
With the applicator in place, it’s time to add the resin. Follow your kit’s instructions to the letter, as the exact process can vary. Typically, you’ll squeeze a few drops of resin into the pedestal and then screw in the plunger. This action creates pressure that forces the resin deep into the chip. You may need to alternate between pressure and vacuum cycles to work out any air bubbles. Be patient here, as this is the most critical part of the process. Rushing can trap air, which will show up as dark spots in the final repair and compromise its strength.
Step 5: Cure and polish your work
Once you’re confident the resin has completely filled the chip, it’s time to cure it. Remove the applicator and immediately place one of the kit’s clear curing strips over the wet resin. This strip holds the resin in place and blocks oxygen, which allows it to harden properly. Move your car into direct sunlight so UV rays can cure the resin; this usually takes about 10 to 15 minutes. After it’s fully hardened, use the provided razor blade at a 45-degree angle to gently scrape away any excess resin until the surface is smooth and flush with the glass.
Common DIY mistakes to avoid
The biggest mistake you can make is trying to fix damage that’s too large for a DIY kit. As a rule of thumb, if a chip is larger than a quarter or if you have a crack longer than a few inches, it’s time to call a professional. Attempting to fix significant damage can make it spread, turning a simple repair into a full windshield replacement. Other common errors include not cleaning the chip thoroughly, working in direct sunlight (which cures the resin too fast), or applying too much pressure and cracking the glass further. If the damage is directly in the driver’s line of sight, it’s always best to seek professional auto glass services to ensure a safe, clear result.
How to Care for Your Windshield After a Repair
You’ve successfully applied the resin and polished the area, but your work isn’t quite finished. Proper aftercare is essential to give your DIY repair the best chance of holding up over time. The first 24 to 48 hours are the most critical for ensuring the resin cures correctly and forms a strong bond with the glass. Taking a few simple precautions can make all the difference between a repair that lasts and one that fails, forcing you to start over or call a professional. By following these steps, you can protect your handiwork and the integrity of your windshield.
Avoid temperature shocks
After a repair, the resin is still settling and hardening. Exposing your windshield to sudden, extreme temperature changes can cause the resin to expand or contract too quickly, which can weaken the bond or even make the chip spread. For the first day, try to park your car in a garage or a shaded spot. Avoid blasting the defroster on high heat or the air conditioner on full cold right at the windshield. Giving the glass a stable environment helps the repair cure properly, which is a key part of the windshield repair process.
Wait before you wash
It might be tempting to take your car for a wash to admire your clear, repaired windshield, but you need to hold off for at least 24 to 48 hours. The high-pressure water from an automatic car wash can force its way into the repaired area, dislodging the resin before it has fully cured. Even washing your car by hand can introduce moisture that interferes with the bonding process. Give the resin plenty of time to set completely. Once it’s fully cured, it will be strong enough to withstand your regular car wash routine and keep your windshield protected.
Keep an eye on the repair
A DIY repair isn't a set-it-and-forget-it solution. For the next few weeks, make a habit of checking the repaired spot. Look for any signs that the repair might be failing, such as the chip reappearing, the area looking cloudy, or tiny new cracks branching out from the original damage. If you notice any of these issues, it means the DIY fix didn't hold, and the structural integrity of your windshield could be at risk. At that point, it’s best to contact a professional for an assessment before the damage gets worse.
Is a DIY Chip Repair Kit Worth It—Or Should You Call a Pro?
Seeing a new chip in your windshield is frustrating, and your first thought might be to grab a DIY kit and fix it yourself. Sometimes, that’s a great solution. Other times, calling a professional is the safer, smarter move. The right choice depends on the type of damage, your comfort level with hands-on projects, and even your car insurance policy. Let’s walk through when to tackle it yourself and when to leave it to the experts.
When a DIY kit might be enough
A DIY repair kit can be a solid, budget-friendly choice for very minor damage. If you’re dealing with a simple bullseye chip that’s smaller than a quarter, a kit might be all you need. These kits are most effective on fresh damage that hasn’t collected much dirt or debris. They work by injecting a clear resin into the chip, which hardens to prevent it from spreading and makes the blemish less noticeable. It’s a practical option if your insurance doesn’t cover minor repairs or if you simply enjoy a good DIY project.
When to call a professional
It’s time to call for professional help when the damage is more significant. If a crack is longer than a dollar bill, a chip is larger than a quarter, or the damage is directly in your line of sight, a DIY kit won’t cut it. These situations require an expert touch to ensure the repair is done safely and effectively, restoring the structural integrity of your windshield. Pros have specialized tools and resins that are much stronger than what’s available in over-the-counter kits. For complex breaks or damage near the edge of the glass, a professional repair is the only way to go.
Will your insurance cover a professional repair?
Before you buy a kit or book a service, make a quick call to your auto insurance agent. Many people are surprised to learn that their policy includes free or low-cost chip repairs. Insurance companies would much rather pay for a small repair now than cover the cost of a full windshield replacement later if that tiny chip spreads. A quick phone call can save you time and money. We can provide a free, same-day quote to make the process with your insurance company even smoother.
The Risk of Ignoring That Small Chip
It’s so easy to do. You’re driving down the highway, a rock flies up, and smack—a tiny new chip appears on your windshield. Your first thought might be to ignore it. It’s small, it’s not in your direct line of sight, and you have a million other things to do. But letting that little chip sit is a bigger gamble than you might think. That seemingly harmless spot can quickly become a major problem for your safety and your wallet.
Your windshield does more than just block wind and rain; it’s a critical safety component of your vehicle. It provides structural support to the car’s frame and plays a vital role in proper airbag deployment during an accident. A chip weakens the glass, compromising its integrity. Everyday driving stress, like hitting a pothole or even just temperature changes from a hot day to a cool night, can cause that small chip to spread into a large crack. Suddenly, a minor issue becomes a serious safety hazard.
Ignoring a chip also means you’re likely signing up for a more expensive fix down the road. A small chip can often be repaired quickly and affordably. However, once it spreads and becomes a long crack, a simple chip repair is no longer an option. You’ll be looking at a full windshield replacement, which costs significantly more time and money.
The good news is that fixing it is simple. Instead of waiting for the damage to get worse, it’s always better to address it right away. You can get a free quote to understand your options and have a technician handle it before that little chip turns into a big headache.
Related Articles
- DIY Windshield Chip Repair: A Complete Guide — Avision Auto Glass
- Why a Small Windshield Chip Spreads & How to Stop It — Avision Auto Glass
- Auto Glass Repair Liberty MO: A Complete Guide — Avision Auto Glass
Frequently Asked Questions
What kind of damage is too big for a DIY kit? As a general rule, you should leave any damage larger than a quarter to a professional. The same goes for cracks longer than a few inches or any chips that have multiple impact points. DIY kits are designed for small, simple bullseye or star-shaped breaks. Anything more complex requires the advanced tools and resins a professional technician uses to properly restore your windshield's strength.
Is a DIY repair really as strong as a professional one? While a DIY kit is certainly better than ignoring a chip, the repair is typically not as strong as a professional one. Technicians use professional-grade resins and specialized injectors that create a powerful vacuum to remove all air from the break. This process ensures the resin fills every microscopic crack, creating a stronger, more durable, and clearer bond than what most DIY kits can achieve in a driveway.
What happens if I make a mistake during a DIY repair? Making a mistake is a real risk with DIY kits. If you don't clean the chip perfectly or if you trap air bubbles during the injection process, you can end up with a cloudy repair that is structurally weak. Worse, a failed DIY attempt can sometimes make it impossible for a professional to properly fix the chip later, which means you might have to get a full windshield replacement instead of a simple repair.
How long does a DIY windshield repair actually last? The lifespan of a DIY repair really depends on the quality of the kit and how well you performed the application. When done correctly on a very small chip, a repair can last for years. However, there's no guarantee. An imperfect application might fail after a few weeks or months of driving. This is a key difference from a professional service, where the work is often backed by a lifetime workmanship warranty for your peace of mind.
Should I try a DIY kit if the chip is in my line of sight? No, you should always call a professional for any damage in the driver's direct line of vision. Even a successful repair can leave a slight distortion or haze in the glass, which can be distracting and unsafe while you're driving. Professionals have the right equipment to minimize this effect and will advise if a replacement is the safer option, ensuring your view of the road remains as clear as possible.